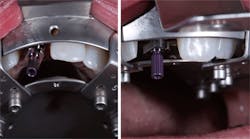
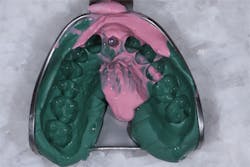
Pamela Maragliano-Muniz, DMD, reviews the WindowTray Implant Impression Tray from Paradise Dental Technologies and shares her technique for using it to take implant impressions.
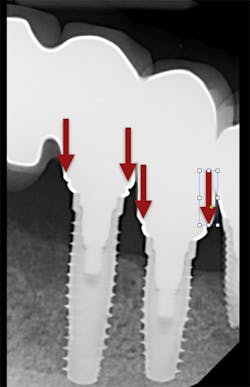
We all know that there are no shades of gray when it comes to the fit of implant-supported restorations—they either fit or they don’t. This makes the accuracy of our impressions especially important when we are fabricating implant-supported restorations. When implant-supported restorations do not fit, the results are increased chair time and appointments, reduced productivity, and increased frustration for both dentists and patients (figure 1).
When making final impressions for implant-supported restorations, we have many decisions to make. We must consider which impression technique (open-tray versus closed-tray or transfer versus pick-up), which type of impression tray (stock versus custom), and which type of material to use. There are patient-related factors that we must consider, including whether there is enough space during maximum opening to use the open-tray technique. Additionally, we may consider modifying our technique or materials if the patient has a hyperactive gag reflex.
When considering the impression tray to use, stock trays suffice when making one to a few units. (1) When making impressions for a full-arch case, custom trays are more accurate because they are rigid and provide support for the impression material. (2,3) When impression material is unsupported, it can be displaced, which can result in inaccuracies. Metal impression trays offer greater rigidity and support for dental impression materials when compared to plastic stock trays. (4)
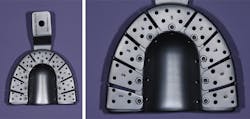
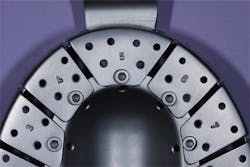
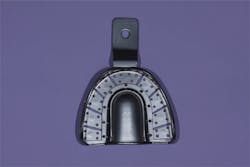
Paradise Dental Technologies (PDT) has created a metal stock impression tray with removable sections in the occlusal part of the tray to facilitate open-tray (or pick-up) implant impressions (figures 2 and 3). This tray is versatile and can be used for single or multiple implant impressions. If all of the sections are secured, this impression tray can be used for any impression. The impression tray is also autoclavable and eliminates the need to dispose of plastic impression trays for implant impressions—which is great for “green” dental practices!
Technique
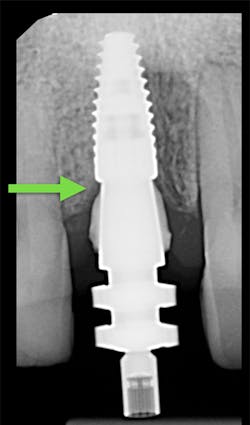
1. Place your open-tray impression coping on the implant you are planning to impress. Confirm its complete seating with a radiograph (figure 4). There should not be a space at the junction of the implant and impression coping.
2. Remove the corresponding section from the impression tray with the driver that was supplied with the tray. In this case, section No. 5 was removed (figure 5).
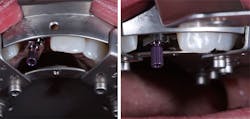
3. Try in the impression tray over the open-tray implant. Make sure that there is adequate space around the impression coping. If the impression coping is located between two sections, remove both (figures 6 and 7).
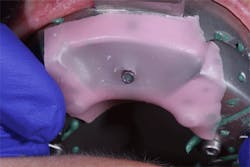
4. There is no need to place adhesive into this impression tray. Undercuts are built into the tray, and the impression material will be secured to the tray through mechanical retention (figure 8).
5. Fill the impression tray with heavy-viscosity impression material and syringe light-viscosity impression material over the impression coping. Seat the tray. Allow the impression material to fully set, unscrew the impression coping, and retrieve your impression with your open-tray impression coping from the patient’s mouth (figures 9 and 10).
Early in my career, I had to section an impression tray to remove an impression! Fortunately, it was a plastic tray, so although it was messy and cumbersome to remove, it was easy enough to section. If you have ever had the misfortune of “locking” heavy-body impression material in an undercut (under a bridge, for example), this tray would be helpful in that kind of scenario because you can remove the sections to dislodge the impression material. Overall, this impression tray is easy to use and very versatile.
Editor's Note: This article first appeared in Pearls for Your Practice: The Product Navigator.Click here to subscribe. Click here to submit a products article for consideration.
MORE READING
Make a good first impression: A guide to accurate full-arch implant impressions
3 denture products this prosthodontist can't live without
References
1. Lee H, So JS, Hochstedler JL, Ecroli C. The accuracy of implant impressions: A systematic review. J Prosthet Dent. 2008;100(4):285–291.
2. Burns J, Palmer R, Howe L, Wilson R. Accuracy of open tray implant impressions: An in-vitro comparison of stock versus custom trays. J Prosthet Dent. 2003;89(3):250–255.
3. Patil R, Kadam P, Oswal C, Patil S, Jajoo S, Gachake A. A comparative analysis of the accuracy of implant master casts fabricated from two different transfer impression techniques. J Int Soc Prev Community Dent. 2016;6(2):142–148.
4. Del’acqua MA, de Avila E, Amaral A, Pinelli L, de Assis Mollo Jr F. Comparison of the accuracy of plastic and metal stock trays for implant impressions. Int J Oral Maxillofac Implants. 2012;27(3):544–550.
