Eenie, Meenie, Minie, Mo
By Cheryl Freeman, DDS, FAGD, and Susan McKittrick, CDA II, CDT
My mother told me to pick the very best one …
and this is it! Isn’t this how we sometimes feel when selecting a restorative material from the myriad of choices? Bonding agents, composites, cements - the choices are endless, and it can be difficult to cut through the hype. This is why I rely so heavily on unbiased sources such as Dr. Michael Miller’s REALITY and Dr. Gordon Christensen’s CRA newsletter. When it comes to product selection for fixed prostheses, there are more choices than ever before. There is no substitute for working with a laboratory whose wisdom, experience, and advice you trust, and being familiar with the characteristics of the products.
The following case illustrates a situation in which the material choice was challenging, and we questioned whether a metal-free restoration would give us the best esthetic result.
A 51-year-old patient presented with generally good periodontal health. Her chief complaint was a fracture of the metal-free bridge on teeth Nos. 8 through 10. Upon examination, esthetic compromises were noted as well. Relative to the adjacent veneer on No. 7, the bridge restoration was opaque and overcontoured.
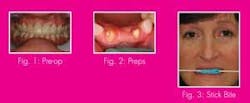
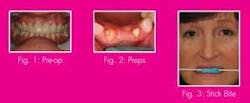
The patient said that she was relieved when the bridge fractured because she was never totally happy with the esthetic result, but could not justify having it replaced when it was functional. I was thrilled to help her achieve a smile of which she would be proud (see Fig. 1 pre-op).
The patient’s goals and clinical condition dictated a three-unit fixed bridge replacing tooth No. 9. Because of strength requirements, Empress was not an option. In consultation with the lab, we compared the stand-alone esthetics as well as the ability to blend with a porcelain veneer of a zirconia-based ceramic bridge system and a Captek restoration, the esthetics and life-like qualities of which often defy the presence of a metal substructure.
Upon seating the patient, we took a series of preoperative photos with a Canon 10D digital camera. These included shade tab photos intended to communicate surface texture, hue, value, and chroma to the lab. The existing bridge was then recontoured to my and the patient’s satisfaction. She preferred a flatter occlusal plane, which was compatible with the curvature of her lower lip in a natural smile.
After refining the occlusion, we took an impression of the modified bridge with Peppermint Snap PVS registration material by Discus Dental to provide a model for the lab to use in making a silicone putty matrix. We elected not to take a facebow transfer because the lab could duplicate the lingual contours with the matrix.
Upon further evaluation, a midline discrepancy was noted, which we did not address. Because of a low smile line, we also did not alter the pontic design. The existing ridge lap pontic had functioned well and had been hygienic for the patient.
After we ensured the patient’s comfort with our in-chair massager, an instrumental CD, and a cozy blanket, we achieved good anesthesia. The existing bridge was removed and heavy chamfer margins were established with Gnathos coarse diamonds.
Occlusal clearance was carefully checked in centric and functional excursions. Final finish and refinements were accomplished with Premier’s Two Striper diamonds. A double-pack technique was used with Ultrapak knitted retraction cord #00 and #0, nonimpregnated.
Because of the thin, friable marginal gingiva on the buccal of No. 10, extreme care was taken to avoid abrading the tissue with the diamonds and to use an atraumatic retraction technique. Two polyvinyl siloxane impressions were taken with Extrude by Kerr, and a stick bite registration was obtained (see Figs. 2 and 3).
Provisionalization is critical in any anterior fixed restorative case. This is when the patient becomes an active participant in determining the guidelines for the final result of the case.
We injected DENTSPLY’s Integrity provisional material into our Peppermint Snap matrix, seated it in the mouth, and allowed it to reach an initial set. Once the tray was removed and a complete cure was achieved, the provisional was trimmed with 12 fluted carbide burs and fine diamonds with particular emphasis on marginal adaptation and interproximal embrasure opening. The patient gave initial approval to the contours.
The provisional was then polished, glazed with Durafinish by Parkell, and cemented with TNE noneugenol cement by Temrex. The patient was instructed on the proper care of the provisional and the daily use of Tooth and Gum Tonic by Dental Herb Company, which maintains tissue tone and health without the staining effects of chlorhexidine-based products.
When the patient returned a week later, tissue health was very good. Upon reevaluation of the provisional, the patient wanted to slightly shorten the incisal edges of the centrals. We did this and communicated the change to the lab with a model generated from an alginate impression (see Fig. 4).
Laboratory procedure
As previously noted, the clinician/laboratory consult determined that the production of both a zirconia-supported and Captek-supported fixed partial denture would provide an interesting opportunity to compare the esthetic qualities of the two different substrates. To ensure the most objective comparison, both frameworks were veneered, contoured, and glazed for delivery by the same ceramist.
Master casts were generated from the impressions provided and articulated using the bite stick (see Fig. 5).
This ensured the proper horizontal orientation of the maxillary cast on the articulator. The corrected maxillary study cast was also articulated and the incisal edge contours and position were recorded with a polyvinyl putty (Siltec lab putty/Ivoclar) matrix (see Fig. 6).
This technique provides the ceramist with a guide for exact placement of porcelain on the definitive restoration matching the patient approved provisional restoration.
The zirconia framework was produced entirely in-house with the Drake-Zeno CAD/CAM system. This technology provides precise, biocompatible, strong substrates with appropriate dentinal shading at the framework level. It was veneered with Vita VMK 9 high-fusing, high-strength porcelain, contoured, and glazed for delivery.
The Captek framework was produced through the patented Captek capillary process (see Fig. 7). The resulting substrate provides a superior background color specifically engineered to match natural dentin.1 Captek also provides a bacteriostatic marginal environment unmatched by any other substrate.2 The framework was also veneered with high fusing porcelain, contoured and glazed for final delivery (see Fig. 8).
These two contrasting technologies are state-of-the-art in their respective categories. The clinical application decision is affected by the past experience and information available to the specific clinical or technical operator. Popular opinion indicates that metal-free restorations are esthetically superior to metal-supported. This has not been our experience at Drake Laboratory. Captek provides a warm hue that complements shades in the red-yellow range. As in all restorative dental technologies, there is no one material that enjoys universal acceptance as the best solution for every esthetic challenge. Therefore, having the full range of choices and understanding when and how to apply them is best.
When the patient returned for the bridge delivery, we compared the two restorations side by side. Both were esthetically acceptable and a vast improvement over the original restoration, but the Captek bridge captured the most natural translucency and depth of color. Both followed the contours of the lower lip nicely in a natural smile. Nevertheless, the inherent level of opacity with a zirconia framework made this restoration appear larger and bulkier though the contours of the two restorations were virtually identical. With the patient, myself, and my assistant in agreement, we finalized the occlusion on the Captek bridge and polished with the Dialite kit by Brasseler. We then cemented the final restoration with Maxcem by Kerr, a self-etch/self-adhesive resin cement with little incidence of postoperative sensitivity, and took our final photos (see Fig. 9).
A nice, esthetic result can be obtained in a given case with multiple materials. To get the best result, consider translucency and opacity, occlusal scheme, adjacent restorations, and how aggressive or conservative your preparation can be. We had an imperfect case with gingival, midline, and other restorative issues we did not address. Nevertheless, we had realistic expectations and the luxury of choosing the best of two materials. We satisfied our patient, and she walked out headed to Disney World with a big, beautiful smile. I have a feeling it won’t be long before I see her to replace the premolar crowns that stick out like three sore thumbs. I’m certain that I’ll choose Captek.


