How to confidently address tooth-wear issues: A systematic approach to achieve function and esthetics
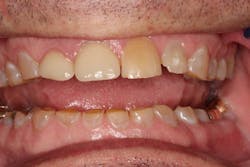
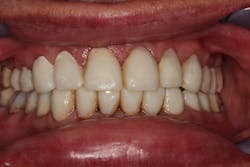
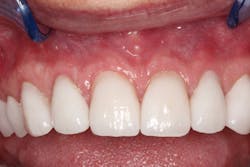
CHRIS CAME TO MY OFFICE IN AUGUST 2013, after another dental professional told him that he needed dentures. He realized that his teeth were wearing away, and he did not want to lose any more tooth structure (figure 1).
Chris, a former Marine, wasn’t after a perfect smile; he just wanted his teeth to last. He looked at me earnestly and said, “Help me. I don’t want dentures.”
What would you do?
Many dentists would want to feel confident that they could address Chris’ problem, but they haven’t had long-lasting results in similar cases. They’ve experienced breaks and flares on patients’ teeth after lengthening the incisal edge or changing the vertical dimension.
I knew I had the knowledge and confidence to tell Chris, “I can help you,” thanks to the Dawson Academy.
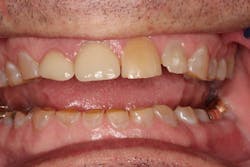
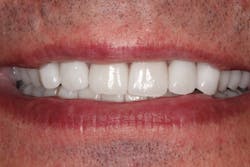
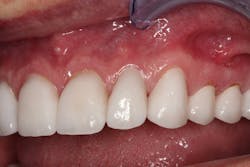
Founder Dr. Peter Dawson pioneered a systematic approach that allows any dentist to properly diagnose the root cause of wear issues. I knew that I could follow this approach to create a beautiful, highly functional, and long-lasting solution (figure 2).
Figure 1: Before
Figure 2: After
The pathway to functional, long-lasting results
The first step for Chris—and every specialty patient—is a complete exam, which is designed to uncover both functional and biological problems.
Through the complete exam, we are able to:
- Determine the health and position of the temporomandibular joints,
- Identify the functional path of occlusion and look for occlusal instability,
- Check the muscles of mastication for symptoms of disharmony,
- Create centric-related mounted models using a facebow on an articulator, and
- Take a full set of photos.
After acquiring this information, I used the Functional-Esthetic 2-Dimensional Checklist. In the 2-D Analysis, we use the patient’s photos to develop our treatment objectives.
Each of the photos has a specific use in visualizing the patient’s ideal smile. The 2-D Analysis establishes vertical and horizontal incisal edge position, gingival margin contour, and determines if the buccal corridor is sufficiently filled.
On the functional side, I followed the Five Requirements for Occlusal Stability to check the patient’s occlusion:
- Stable and equal intensity stops on all teeth in centric relation.
- Anterior guidance in harmony with the envelope of function.
- All posterior teeth disclude during mandibular protrusive movement.
- All posterior teeth disclude on the nonworking side during mandibular lateral movement.
- All posterior teeth disclude on the working side during mandibular lateral movement.
As it turned out, the patient didn’t meet any of the five requirements.
On the esthetic portion, I found multiple problems. The patient’s teeth were too short from wear, his incisal edge positions were off, and his gingival architecture was not correct.
After discovering this information, I followed the 3-Dimensional Checklist. With it, I determined the need for increasing the vertical dimension of occlusion as well as balancing the occlusion.
This is the 3-Dimensional Checklist:
- Establishes the lower incisal edge position in harmony with the plane of occlusion
- Builds the upper incisal edges to the position derived from the 2-D Analysis
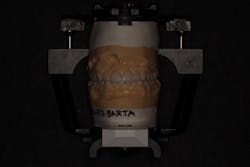
- Places the models on the articulator to complete the wax-up (figure 3), providing equal intensity stops on all teeth with anterior guidance that prevents posterior interferences in all directions of mandibular movement
From this checklist, I determined that the patient’s incisal edges were in the wrong position, and his gingival levels were in the wrong position due to extrusion.
An additive equilibration was necessary to lengthen his incisal edges. It is important not to steepen the anterior guidance, and I was able to make the lingual contours appropriate for his bite.
The 2-D and 3-D analyses and wax-up gave me the information necessary to develop a treatment plan for achieving the patient’s objective. Our goal is always to do the least amount of dentistry necessary to get the best results.
Figure 3: Wax-up
The patient’s treatment plan included crown lengthening throughout his mouth for esthetic concerns and to gain appropriate tooth structure to retain crowns. He needed full upper and lower crowns. The incisal edges needed an addition of 2 mm, and the gingival margins needed to be raised 2 mm on the upper, with the same measurements for the lowers.
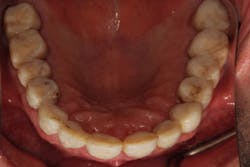
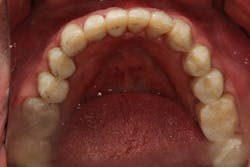
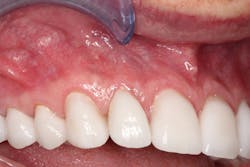
A periodontist completed the crown lengthening surgeries in three separate visits. After healing, the teeth were prepared for crowns, and provisionals (figures 4–6) were placed.
The Dawson Academy’s 10-Step Provisional Checklist assures a predictable outcome:
- Refine and verify lower incisal edge position.
- Establish centric holding stops.
- Ensure lip support in line with alveolar contour.
- Check for lip closure path.
- Determine incisal edge length, using smile and rest lip position.
- Verify incisal position using “f” and “v” sounds.
- Adjust for long centric.
- Establish lingual contours.
- Evaluate “s” sounds.
- Evaluate cingulum contours using “t” and “d” sounds.
Chris “test drove” the provisionals for function and esthetics. He returned to my office after a few days to give his approval for the final steps. None of the temporary crowns had come off, which is a sign that the final result will be long-lasting.
Figure 4: Provisionals
Figure 5: Provisionals
Figure 6: Provisionals
Our team took impressions and photos of the provisionals. The lab was able to copy the prototypes for incisal edge position, as well as facial and lingual shapes of the teeth. This information is crucial to ensure that the lab does not have to do any guesswork.
Chris returned for us to cement the crowns. The lab had fabricated exquisite-looking crowns that function properly (figures 7–9). We prepped the uppers in one day, lowers in another day, and cemented all in one day.
Figure 7: Final crowns
Figure 8: Final crowns
Figure 9: Final crowns
I checked for fit and fine-tuned the patient’s bite with T-Scan (Tekscan), and Chris has been smiling ever since.
Conclusion
Even the most complex cases can be broken down into a series of simple steps with proper planning and forethought. It all starts with a complete exam and diagnosis, followed by a properly developed plan that meets the patient’s goals and the requirements for a stable occlusion.
And, if a patient cannot do all of the treatment at once, the philosophy I followed allows dentists to sequence the treatment plan by addressing lower anteriors first, upper anteriors second, and posteriors third.
Author’s note: All clinical points, checklists, and requirements are from the Dawson Academy.
Read more clinical dentistry articles at this link.
Editor's note: This article originally appeared in Breakthrough Clinical, a clinical specialties newsletter from Dental Economics and DentistryIQ.
About the Author

Stephen Hoard, DDS
Stephen Hoard, DDS, is an associate faculty member at the Dawson Academy, and he leads its Twin Rivers Study Club. He owns J. Stephen Hoard, DDS, Cosmetic & Restorative Dentist, in New Bern, North Carolina, where he practices full time. Dr. Hoard is a member of the American Academy of Cosmetic Dentistry, the American Dental Association, and the North Carolina Dental Society.
