When using lasers in the dental operatory, it’s important to (1) read the tissue, (2) tip to the tissue, (3) understand how much time to spend in the sulcus, and (4) slow down. In this article, we’ll look further into these four takeaways.
No. 1: Read the tissue
What does it mean to “read the tissue”? When using lasers, laser educators often teach us to push a button on a laser using a preset that the laser manufacturer has set up on their machine. However, each laser has different chromophores that they are attracted to, which means that the presets on the lasers could be too high or too low for the tissue on which you are working.
What happens if I use the suggested laser settings? Lighter chromophores may take more laser energy at a higher setting to get tissue interaction, and darker skin tones may take less energy. If you are doing hygiene procedures, you’ll want to make sure you don’t have the setting too high and start cutting tissue—which would be outside your scope of practice.
Can’t I just use the settings that are already on the laser? Yes, as a new laser user, this may be a good place to start. But as you learn about tissue interaction, you also need to be able to read the tissue.
Aren’t the settings all the same for each patient? No, all the settings are based on the chromophores, as stated above. A chromophore is part of a molecule responsible for its color. When a molecule absorbs certain wavelengths of visible light and transmits or reflects others, the molecule has a color. Visible light that hits the chromophore can thus be absorbed by exciting an electron from its ground state into an excited state.
What all needs to be considered in laser tissue interaction?
Power density + Duration of exposure + Amount of cooling + Wavelength + Emission mode + Tissue characteristics = BIOLOGICAL EFFECT
All these things are what allow us to know what settings we should consider for each patient.
How do I make sure I am working within my scope of practice? We need to stay in the parameters of what we can do legally as dental hygienists. Listed below are some temperatures and effects that can occur with laser energy. Keep in mind that we don’t have a thermostat on our lasers, so, once again, we need to read the tissue to see what is taking place.
Thermal effects on tissue
Tissue temperature (°C) Observed effect
37–50 ... Hyperthermia, edema
60 ... Coagulation, protein denaturation
70–90 ... Welding, dehydration
100–150 ... Vaporization, ablation
Greater than 200 ... Carbonization
No. 2: Tip to the tissue
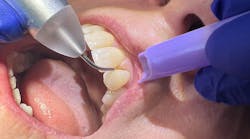
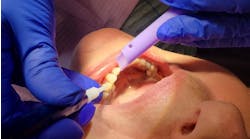
How do I move the fiber in the sulcus? What direction do I move? Some trainers tell their students to just put the fiber into the sulcus and “swirl it around,” but it is important to allow the fiber tip to interact with the tissue and to move the fiber in a cross-hatching movement. This allows it to reach as much of the diseased tissue as possible. If the tip is not pointed at the tissue, it cannot interact correctly.
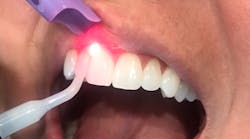
What am I trying to do in the pocket? Use a tip-to-the-tissue technique. Point the tip of the laser fiber toward the tissue for proper interaction. This is easily done by placing the curve of the canula or metal portion leaning against the tooth toward the tissue to assure that the tip is properly placed.
What am I looking for on the tip? As coagulum begins to form on the tip of the laser, it is important to move out of the sulcus, take your foot off the foot pedal, and wipe off the end of the fiber with a 2x2 gauze that is dry or wet with water (never alcohol) before you go back into the sulcus.
How often do I come out of the sulcus? Whenever you notice coagulum accumulation on the tip, exit the tissue. You don’t want to let the tip get too hot or carry the coagulum to other areas. Remember, you won’t see coagulum on the laser fiber every time.
How do I place the laser fiber into the tissue? Place the fiber into the sulcus before you put your foot on the foot pedal. If you activate the laser before you place the fiber into the sulcus, the tip of the laser will become hot. Touching the tissue with the laser tip can cause the patient pain or potential injury.
Will it hurt the tooth if the laser touches the tooth? Since the diode laser is not attracted to the enamel, there will not be any interaction. However, with the laser placed on the tooth, there will be no benefit for what you are trying to accomplish.
No. 3: Understand how much time to spend in the sulcus
How much time should I spend in the sulcus? The time in the pocket will depend on the amount of disease in the pocket as well as the depth of the pocket. The more disease and the deeper the pocket, the longer the time needed in the pocket.
How long do I stay in the sulcus? This is one of the biggest questions that comes up all the time. The length of time you’ll stay in the sulcus depends on how much infection is present, how deep the pocket is, the hygiene of the patient’s gums, and the complications with the patient’s health. There is no cookie-cutter setting or set amount of time. I teach laser users to use a cross-hatching motion, so of course that depends on how much infection and bleeding are present as well as the depth of the pocket. All of this determines how much time you spend in the pocket. Please note that you don’t just put the laser into the pocket and count to 15 seconds. That won’t work for the majority of the procedures, and it won’t get you the results you’re looking for!
No. 4: Slow down
This is not a Cavitron; it’s a laser. We need to remember that if the laser cannot “see” the diseased tissue, then it cannot interact with it. So, if you go too fast into the pocket, the laser won’t be able to do anything in the sulcus.
How fast do I move the laser? The laser needs to be used much slower than most people think. Hygienists are used to using a Cavitron, and they often will keep up with the speed of that tool. The laser needs to be used at a much slower speed. If in doubt, slow down!
Other things to consider
Do I need to initiate the tip? It’s not necessary to initiate the tip (which means putting dark pigmentation on the end of the fiber using a cork, articulating paper, etc.) for hygiene procedures, but do know that it’s not wrong if you do. You don’t need to initiate the fiber for lesions, desensitizing, or laser bacterial reduction (LBR), but some do for laser-assisted periodontal therapy (LAPT). Doctors will need to initiate the tip if they will be using the laser to cut tissue.
What if I was told never to initiate the tip, and replace the tip if it becomes initiated? Some states don’t allow hygienists to use an initiated tip. (This has always been up for discussion, since when the tip sees dark pigmented bacteria, it will initiate.) As a hygienist, there is no need to initiate the fiber, but you also don’t need to replace the tip. Just use the temperature guide to know what the changes are in the tissue.
Final takeaways and tips
- Don’t get so stuck on the laser settings that you don’t look outside the box and adjust as needed to read the tissue.
- Place the tip to the tissue. This is the only way the laser can “see” what it needs to see to interact with the tissue.
- Stay in the pocket long enough to allow the laser energy to interact with the tissue and decontaminate the diseased tissue.
- Slow down. Don’t go so fast, or you won’t be able to interact with the diseased tissue.
- The laser is not an ultrasonic tip.
- You need to completely laser the entire, diseased tissue.
- You need to know the depth of the pocket as well as the width of the pocket.
- You need to work in manageable areas of the sulcus—don’t try to cover too much surface all at one time. Come out of the sulcus, evaluate, and then decide what your next step is.
- Remember, it’s not just “push a button and place the laser fiber into the sulcus” without any direction and whatever speed you want.
Take all these considerations prior to beginning your laser procedure; this is where proper training is essential. The Academy of Laser Dentistry is a great resource for information and should be seriously considered for the most up-to-date, peer-reviewed training that you can receive for laser education. Please reach out to me for more information for any of your laser education needs.
Editor’s note: This article first appeared in Clinical Insights newsletter, a publication of the Endeavor Business Media Dental Group. Read more articles and subscribe.


