Editor’s Note: The author was the passenger in a car that was hit in a head-on collision. The impact of the airbag led to comprehensive dental restorations. Her story was initially chronicled in RDH magazine: “Airbag versus face: Post-crash journey leads author on search for dental normalcy.” Her comments below are follow-up comments to home care after treatment ended.
By Debra A. Viger, RDH, BHS
Permanent implants in and hopefully the end of my journey. In the last few months, I have learned even more of what we need to educate our patients about the process. The temporaries may look great, but are for appearance and not to be used with the forces of chewing.
Maintaining excellent home care is of the utmost importance because the tissue needs to heal around the implant. Either hand brushing or electric brushing is completely appropriate. Implant crowns can be placed either using a cement or with a screw attachment.
There are different types of floss techniques for each. Let your patients know that the implant is thinner than the actual tooth. So floss will feel awkward as it is slid under the tissue and goes deeper (see photo at left above). If the crown is cemented in place, a crisscross technique can be used where the floss can be placed both mesial and distal wrapping behind the lingual and then crossed over the buccal to fully encircle the tooth (see photo at right above). Then a back and forth motion can be used allowing the entire surface to be cleaned fully.
If the implant crown is adhered using the screw technique, then this criss-cross method could actually cause recession and disrupt the tissue! The screwed-in implant should be cleaned using the traditional floss technique, letting the patient see how much deeper into the tissue the floss will travel. With either technique, allow the patient to practice in your office, seeing just how deep the floss should be placed.
For me, I wish I had known how sensitive it is when the temporary comes off and the implant is first placed. While it may only last several seconds, it is pretty intense and may need to be done several times as adjustments are made.
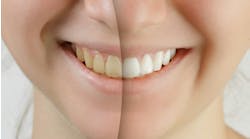
Spend time with your patient in both natural and artificial light, making sure the color is a match with the natural smile. Check that the bite is comfortable and allow the patient time to wear and use them so avoid any potential objections down the road. Photos from different angles are very useful to make sure the mesial and distal angles are natural in appearance and comfortable in the chewing process.
Several months later, I am surprised that no one has ever noticed the change in my smile. I totally credit an excellent dental team with the success of this journey. Let your patients know that there will be challenges and minimal discomfort, but that challenges may arise and you, as a team, are there to support them in the process.


