Editor's note: Article originally posted January 29, 2019; formatting updated February 10, 2024.
Michael Douglas is an American actor and producer who has won four Golden Globes. In 2010, Douglas was diagnosed with oral cancer on the base of his tongue. He was treated with radiation and chemotherapy. Today, Douglas is cancer-free. He continues to have regular checkups to monitor the remission of the disease.
What if there are patients we are seeing who are also in danger, just as Michael Douglas was? As dental hygienists, we play crucial roles in detecting oral cancer. Some of us are probably seeing patients right now who need our help. How can we do this? The first step is providing thorough oral lesion inspections.
Additional reading:
In this article, I will discuss eight critical components or "steps" to documenting oral lesions. Through documentation, we can work with our dental teams to correctly identify lesions and take appropriate action.
Oral lesions: Gathering evidence
Crafting written descriptions of oral lesions is like recording evidence from a crime scene: it's important to gather as many clues as possible. The clues we find will guide us to the right action, be it monitoring the situation, gathering additional information, or referring patients to a specialist.
It should be emphasized that the patient record is a legal document. As clinicians, we must keep high standards to avoid legal problems down the road.
Eight steps of documentation
Here are the eight steps to describing and recording clinical findings for oral lesions.
- Location
- Distribution and definition
- Size
- Shape
- Color
- Consistency
- Texture
- History
Here is an example of how you might chart the lesion seen in Figure 1.

- Location: behind the patient’s right-side first molar, on the buccal mucosa, above the occlusal plane
- Distribution and definition: single, localized, and well-circumscribed
- Size: 8 mm diameter
- Shape: round macule
- Color: black/blue
- Consistency: soft, similar to surrounding tissues
- Texture: smooth
- History: Patient found the lesion two weeks ago. She reports no history of trauma. No other significant findings on the medical and dental histories.
This oral lesion turns out to be an amalgam tattoo, which is harmless and usually does not develop into cancer. But before arriving at that conclusion, you should chart all the findings and properly store the records. Whenever the patient comes back, you should examine the oral lesion and note any changes.
Memory tricks
To remember the eight components, you can use a memory technique that I teach at WakeUp Memory and my RDH Under One Roof presentation on oral pathology. In this case, you make an acronym of the first letter for each component: LDSSCCTH. Now, make a sentence (or sentences) that you can remember. Here are examples of ones that help me:
Long day sunbathing. Skin colored. Crave tart Heineken.
Last day of hot summer. Cool September coming tomorrow. (I reorganized the letters.)
You don’t have to remember these same sentences. Take the time to make something that is personal to you.
Documenting details
Knowing the eight steps is a good start, but let’s look at each item closer. This will help you become proficient in charting oral lesions accurately.
Location—This is simply where the lesion is. Use a fixed point of reference, such as "mesial of the mandibular first premolar" or "5 mm from the tip of the tongue and 3mm from the midline." The probe is an excellent ruler to measure distances from the point of reference.
Distribution and definition—This means how "spread out" the lesion is, how many lesions there are, and what the margins look like. Here are the terms to describe distribution and definition:
- Localized (focal, found in one area only) or generalized (diffuse, found in most of the tissues in one area)
- Single or multiple
- Well-defined (circumscribed) or poorly-defined (vague). Note that a well-defined margin can have regular or irregular borders.
Size—Measure the diameter in millimeters or centimeters. Also measure the length, width, and height of the oral lesion. (In that exact order!)
Shape—Record what the lesion looks like, i.e., round, rectangular, etc. Then, add a little more using the following terms:
- Macule—flat lesion
- Vesicle—elevated lesion
- Pustule—purulent lesion (filled with pus)
- Papule—lesion less than 5 mm in diameter, raised with no fluid
- Nodule—lesion less than 2 cm in diameter, raised with no fluid
- Plaque—broad, slightly raised lesion
- Sessile-based—broad attachment
- Pedunculated—stalk-like attachment
- Ulcers or erosions—depressed lesions
- Color—lesion can be single-colored or mixed
Consistency—Press the lesion your finger and feel the consistency. It can be one of the following:
- Soft
- Hard
- Fluctuant (fluid-filled lesion that moves fluid from one area to another when the lesion is pressed)
Texture—Move your finger pad across the lesion and feel the texture. It can be one of the following:
- Smooth
- Rough—papillary (finger-like projections), corrugated (rippled), fissured (deep crevices), crusted (covered with scab)
History—Ask some of the following questions and record the responses.
- When did the lesion appear?
- Do you have any pain? Can you describe how the lesion feels?
- Did you have lesions before?
- Did you experience any trauma in the area?
- Did your medical history and medication change?
Differential diagnosis
After you complete the eight-step oral lesion charting, then you can start formulating a differential diagnosis. You can also ask for the help of the doctor or a specialist. Remember: documentation can save your patient's life!
Practice
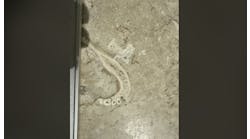
Here is a practice image in Figure 2. Try to describe it using the eight components of good oral lesion descriptions. For this example, take a guess the consistency and texture. (This is only for practice!)

Go through each item on your list:
- Location
- Distribution and definition
- Size
- Shape
- Color
- Consistency
- Texture
You can find how I charted this lesion on this page. Practice your skills and soon you will be a pro at detecting and charting oral lesions!
Related reading:
Resources
- DeLong L., Burkhart NW. General and oral pathology for the dental hygienist. Philadelphia: Wolters Kluwer Health/Lippincott Williams & Wilkins, 2013.
- Early Detection, Diagnosis, and Staging. Oral Cancer Foundation website. https://oralcancerfoundation.org/cdc/early-detection-diagnosis-staging/. Accessed December 9, 2018.
- Ibsen OAC. Oral Pathology for the Dental Hygienist. Elsevier, 2014.