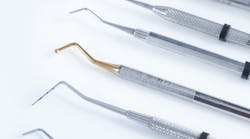
Sharpening can be hard. But as one hygienist recently told us, it shouldn't have to be, and your technique can make all the difference.
That's why we surveyed readers of DentistryIQ, RDH magazine, and DE's Product Navigator e-newsletter to find out how they keep their instruments sharp.
Of the 521 clinicians who responded, 317 hygienists shared their favorite tips and tricks for instrument sharpening. We selected 20 of our favorite tips and listed them below (in no particular order) to help you keep your sharpening game strong.
____________________________________________________________________________________________________1. Use a saliva ejector to test if no tester is available. 2. It's not a race. Many times, if done regularly, the instrument(s) need only a few strokes. If you use the "stationary instrument, moving stone" technique, I recommend taping the countertop where you sharpen with one piece of masking tape at a 90-degree angle to the countertop (for precise instrument placement) and a second at 110 degrees (for the stone angle). This will allow you to see the proper angle needed to sharpen. Keep in mind that the shaft of the instrument (not the handle) needs to be at 90 degrees. 3. Take a CE course or a lunch-and-learn that breaks down sharpening techniques and teaches you how to appreciate the original shape of the instrument. 4. Learn from someone who knows how to sharpen well. 5. Do not allow your instruments to get too dull. Otherwise, you'll spend more time trying to create a sharp cutting edge. Also, you'll end up working harder and applying increased pressure, creating unnecessary discomfort for your patients. 6. Don't over-sharpen, but sharpen on an as-needed basis. Keep a sterile stone out while scaling and root planing. Burnishing calculus is not effective. Work smarter, not harder—a sharpened instrument always works better. Also, discuss sharpening with the team; consistency is good. 7. Use both an automated sharpener and a stone. 8. Keep the stone clean of debris! Don't let the filings stay on the stone or get embedded in the stone. 9. Use a few different stones. Depending on the stone, check it for grooves and "ditched out" spots. 10. Use a guide. It'll save money in the long run and keep the edge consistent, making it faster to sharpen. 11. If sharpening by hand, use a good stable fulcrum to ensure a good result and proper angle. 12. When sharpening without a guide, rest your elbow on the tabletop to stabilize the instrument. This helps to keep it at eye level so you can watch the angle of the sharpening stone. 13. When sharpening by hand, always end on a down stroke. 14. Send your instruments out to a professional service. 15. Lay the stone down when sharpening anterior scalers. 16. If multiple hygienists are sharpening instruments in the office, using a guide helps to standardize the outcome and lengthen the life of the instruments. 17. I (carefully) cover the face with permanent marker or marking paper. When the black is gone, I know I have sharpened the entire instrument, not just the tip. 18. Never use or try to sharpen instruments that no longer have the original shape/contour that they had when they were new. These are just a break in a patient's mouth waiting to happen. 19. Use a fine stone to gain the sharpest edge possible. If you use a coarse stone to "transform" an old instrument, always finish with a fine stone—same principles as sanding anything. 20. Practice, practice, practice!
_______________________________________________________________________________________________________________
Got a tip of your own to add to the list? Comment below!
_______________________________________________________________________________________________________________
Editor's Note: This article first appeared in the e-newsletter, Pearls for Your Practice: The Product Navigator. For more articles like this, click here to subscribe today.


